This article is written in partnership with Japanese Rice Flour—they’re dedicated to making gluten-free cooking more accessible for everyone, and we’re honored to work with them. ~ ed.
Some of my earliest memories involve baking.
I would stand on the tall, dark wood kitchen stool as my mom pulled out the worn, grooved cutting board from inside the countertop in the kitchen of the house I grew up in.
In one memory I’m helping her bake a family birthday cake and in the next, well, I didn’t need the help any longer and I was the one baking that cake for the birthday celebrations.
Soon I was collecting cookbooks at thrift stores and teaching myself how to bake on the weekends—but always from that kitchen stool, propped up at that worn butting board.
Though, it was soon after that the unthinkable happened and those cookbooks and I became frenemies.
Going into high school, I found myself unable to eat gluten and starting on a desperate search for a way back to normal.
I had to take all of that knowledge I’d gained, set it aside, and learn how to cook again. After all, remove the wheat from a birthday cake and you have to start over again with the basics.
For a while, I hung up my apron strings…until I couldn’t do it anymore.
My oven was calling to me and I’m nothing if not stubborn. This was before gluten-free products were mainstream. If I wanted those foods I was missing, I was going to have to do it myself.
I tackled gluten-free cooking like there was no tomorrow and in doing so I learned how to bake again. It just took time, and a lot of horrible, horrible mistakes. There were caved-in breads, doughy, uncooked muffins, and cookies that wouldn’t bake through no matter how long I kept them in the oven.
But perhaps the most confusing part was going from a small handful of wheat flours to an entire pantry full of gluten-free options. I lined them up on my shelves in Mason jars and studied them, hoping to find the solution to their mysteries. Each flour came with a new taste, new texture, and a new way to use it. These weren’t like wheat. They were each their own beautiful, delicious ingredient.
Opening my pantry to gluten-free flours felt like seeing in color for the very first time. Each flour had a new character and its own flavor and slowly, very slowly, I was able to uncover them.
Rice flour was my first choice to explore because it was readily available, relatively inexpensive, and it was mildly flavored, unlike other whole grains. With the mild flavor profile, it’s easy to adapt to a wide variety of recipes without detracting from the other flavors or seasonings found in the dish. In fact, it’s been described by the New York Times as “a versatile rainbow.”
The rise of gluten-free flour has encouraged many people to reconsider the effects of wheat on their bodies, and now the introduction of non-gluten rice flour will reinvigorate and expand the world of gluten-free food even further.
The importance of non-gluten versus gluten-free.
The main difference between most gluten-free flours and non-gluten rice flour is that it clears stricter certification standards compared to gluten-free. Non-gluten is required to be 1ppm or less of gluten content, where on the other hand gluten-free only has to be 20ppm or less. Therefore, the lower level of gluten content in non-gluten rice flour makes it a more secure alternative for people with Celiac’s disease or a strict gluten-free diet.
How to use rice flour.
Cooking with rice flour (also rice powder) can often be tricky if you aren’t familiar with the various types of rice flour and how each one has a slightly different characteristic when used.
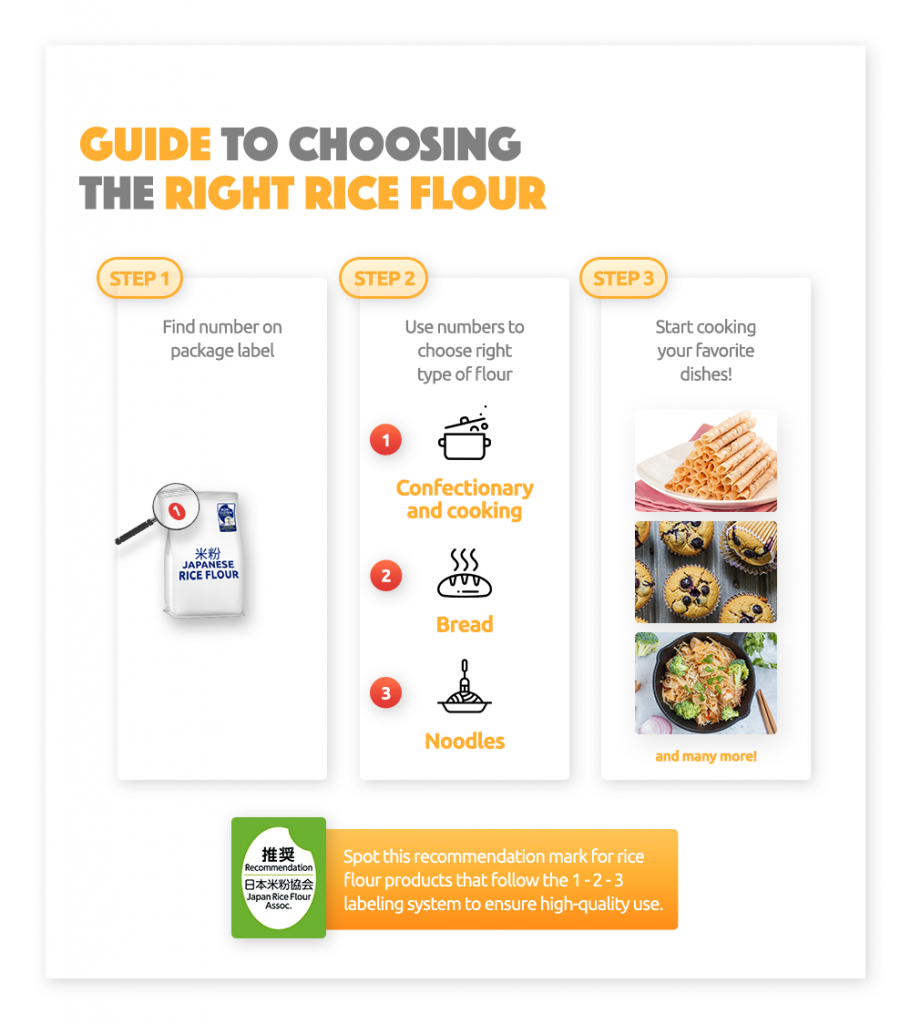
Rice flour comes in three different types. 1. Rice flour for confectionary and cooking 2. Rice flour for bread making, and 3. Rice flour for noodle making (sometimes called glutinous rice flour although it is non-gluten) are sold separately or are often found in gluten-free flour blends. Some blends, like Japanese Rice Flour are conveniently assorted into the three categories for easy identification while shopping so that you can choose the correct flour for the recipe you plan to prepare—taking the guesswork out of the equation.
Just check the number on the bag of rice flour according to this classification system and you are set to start cooking your favorite dishes:
Additionally, when you’re baking with gluten-free flours, rice flour or otherwise, it’s always smart to bake according to weight.
Each flour has a different weight and therefore one cup of rice flour doesn’t equal one cup of another flour, per se. Measuring your ingredients by weight allows any recipe to be converted, simply by swapping out the same amount of gluten-free flour called for in grams or ounces as the recipe requires.
A simple, inexpensive kitchen scale is one of the most practical investments a gluten-free cook can make if they plan to tread into the world of gluten-free baking.
Discovering this and through trial and error (so much error) my baking improved and gluten-free cooking began to take shape.
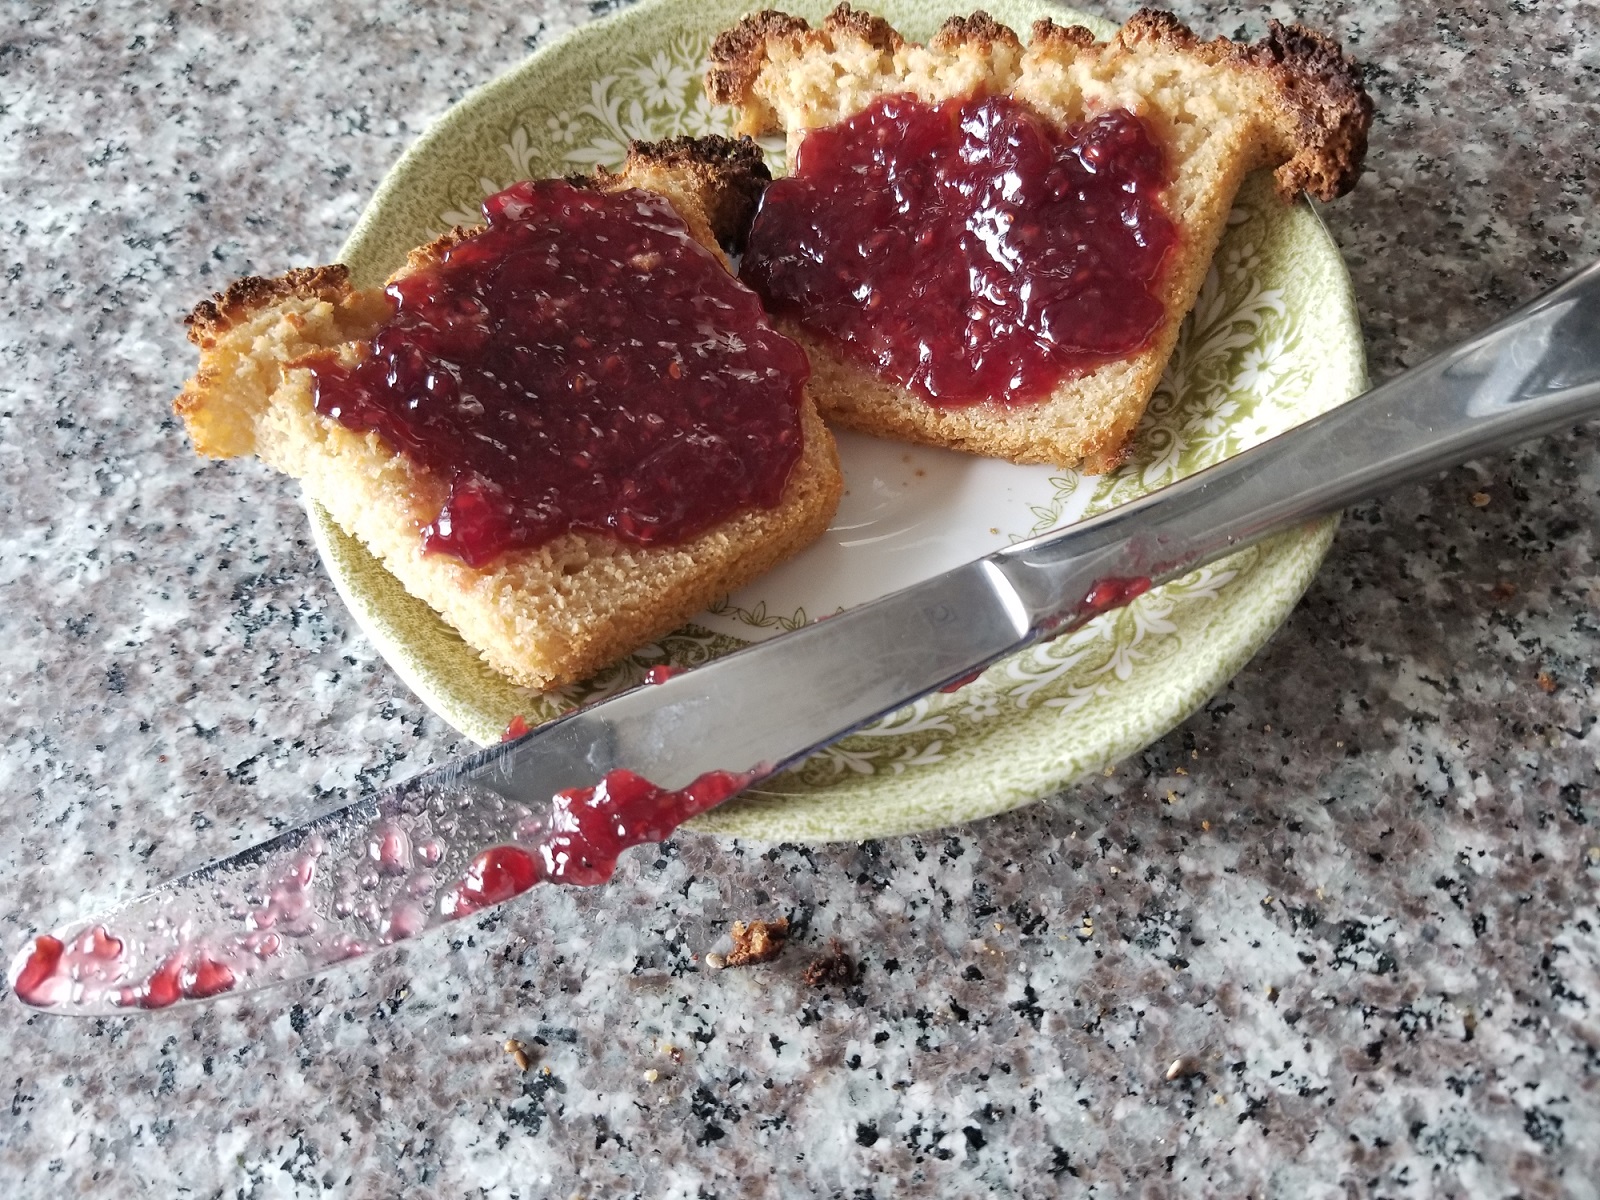
Here’s one of my favorite recipes featuring rice flour to get you started. This makes just a mini loaf, so don’t be surprised if it disappears quickly! My family munched on it with jam for breakfast alongside our morning cuppa and as a mid-afternoon snack of bite-sized sandwiches on a busy weekend.
It was filling and the bread texture was delicious, both toasted and untoasted. I sprinkled sesame seeds on the top of the loaf before letting it rise and it gave a delicious toasted flavor to the sandwiches.
The rice flour and yeast make this a wonderfully chewy bread. I’m glad I always have rice flour in my pantry these days because whipping this up was fast and easy and had me dreaming of all the meals I wanted to serve alongside a slice of fresh bread. I’ll be making this again, soon! (And likely often.)
Non-Gluten Yeasted Rice Flour Bread
- 300 grams Japanese Rice Flour #2, ideally (or any rice flour classified for bread baking)
- 30 grams sugar
- 5 grams salt
- 5 grams yeast
- 210-235 grams lukewarm water
- 30 grams oil
- In a bowl, add the measured amounts of dry ingredients—rice flour through yeast. This is most easily done by placing a bowl on a kitchen scale and “taring it” to zero-out the weight of the bowl. This allows you to add an ingredient and only measure the weight of that ingredient. Start with the rice flour. Measure out the 300 grams and “tare” the scale again to start the next ingredient. Continue until you reach the yeast.
- Mix well.
- To the dry ingredients, add the water and oil, starting with less water and adding more only if you need it. Mix again, making sure there are no lumps or unmixed portions of flour hiding in the bottom of the bowl.
- This recipe makes approximately 190 grams of dough. Pour the batter into a small bread pan. A mini loaf pan or cube-shaped loaf pan should hold this amount of dough.
- Using a knife, chopstick, or another utensil, stir the dough inside the pan to pop the bubbles. You can also tap the pan lightly against a countertop to eliminate bubbles.
- Set the loaf aside in a warm location (such as the back of your stove) to rise. Check on it in 30-35 minutes.
- Bake the loaf at 220 C/425 F for 25-35 minutes until the color is a toasted brown on top and the loaf sounds hollow when you tap the center.
- Cool completely before cutting.
Find more delicious non-gluten rice flour recipes here >>
Enjoy!


Read 4 comments and reply