

 Share on bsky
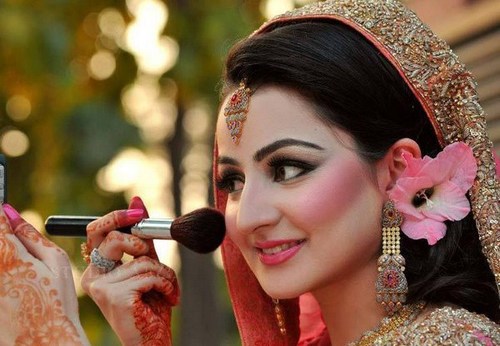
Every bride wants to look beautiful and radiant on the D-day. While some prefer getting their makeup done from professionals, others like to do their makeup. Doing self makeup for the wedding is a pretty awesome idea. This can be a task for someone who has never tried doing makeup or even for the girls who rarely wear makeup. But don’t worry I am going to describe the in-detail procedure that will help you to achieve that look for Instagram worthy photos.
However, I would suggest you to try doing trial makeup before the big day to get some hands-on experience. Ready? Get your makeup stash and start doing it yourself.
Start prepping the face
Moisturize your face before starting the makeup. Once your face is well moisturized, select a good primer. There are many types of primers available such as Matte finish, Dewy finish, etc. You can select the type depending on the kind of makeup you want. Make sure you choose the one that blurs out your pores and makes your face smooth for applying makeup. Massage your primer well on your face and neck region too.
Eye Makeup and Eyebrows
I would recommend you to do the eye makeup first so that you can clean the fallout from eyeshadows without messing your makeup. Select the shades that match your wedding dress. Apply concealer on your eyelids so that the eyeshadows are appropriately applied on the lids. Blend the shadows properly. Apply eyeliner on the top of it. Add volume to your eyelashes by wearing fake eyelashes. Apply mascara to get the effect of long eyelashes.
For eyebrows, fill in the gap of the brows with an eyebrow pencil. Apply an eyebrow tint or gel to set the eyebrows. Clean the fallout from the face to start the base makeup.
Time for base makeup
Take a foundation that matches your skin tone. To get a radiant look, I would recommend to mix it with a strobe cream. Adding strobe cream gives a subtle and natural radiance. Blend the foundation properly on the face and neck with a brush or beauty blender. Take time to blend it correctly as this is the crucial step of the makeup routine.
Once you are happy with how the foundation looks on your face, now it’s time for a concealer. Select a lighter shade of concealer to brighten the concealed areas on the face. Apply it under your eyes, on the bridge of your nose, cupid’s bow and also the hollows of the face where you are going to contour the face.
Blend the concealer properly and take time with blending. To avoid creasing under eyes, you can set the concealed areas with translucent powder or face powder. If you feel the need, you can set your entire face with powder.
Blush, Highlight and Contour
These three makeup products help to add some color to your face. Select a rose pink colored blush to apply it on your apples of cheeks. For applying blush correctly, smile wide and you will be able to see the apples of the cheeks. Take fluffy blush for applying and blending blush.
For Contouring, make a fish face to find hollows of your face. Take the right shade of contour and start contouring the areas such as your jawline and the hollows. You can use a brush or beauty blender for blending it. Make sure that there are no harsh lines of contour by blending it properly.
The highlight is my favorite step, with the help of a fan brush apply highlighter just above your blush. Apply the highlighter on the areas of the face that are the high points of your face. Like the bridge of your nose, the chin and cupid’s bow.
You can also bronze your face if you feel that your face is lacking warmth. Take a fluffy brush and bronze your face by applying it gently.
Lips and final touches
Wipe off the lip balm from your lips. Line your lips using with a lip liner. Apply a good layer of lipstick on it. I would suggest a liquid lipstick or a matte lipstick so that it lasts for a long time. Set your face with a makeup setting spray and voila… you are done! The bride is now ready to get those pretty bridal pictures.


Read 0 comments and reply