
 Share on bsky
Champagne for Bodhisattvas.
Kombucha brewing is deceptively easy. Once you start it’s only a matter of time before you run out of friends to give away baby cultures to. They are sturdy and reproduce like bunnies, soon you’re tossing them in the compost or debating pureeing them into your smoothies. They are living sentient beings like something out of Star Trek.
A blog titled, “Are Mason Jar Ferments Safe?” caused ripples in the nourishing foods world recently. A more apt name for the blog would have been “Are Open Air Ferments Safe” or “Are Aeorbic Fermentations Safe?” Speaking specifically about sauerkraut and kimchi type ferments, though anaerobic fermentation is how to make a top quality tasting kombucha, it seems to still be a secret except amongst mead/beer brewers.
I’ll save you the trouble of reading the blog. Yes, aerobic ferments are safe. Anaerobic fermentation on the other hand, is the most ideal environment for receiving the most beneficial bacteria, without having to scrape off mold. Anaerobic ferments taste better, but aerobic fermentation works too.
To sound like you know anything about fermentation there are two crucial terms you need to know:
Aerobic fermentation means gases such as oxygen may come and go as they please, i.e you have a bowl of something fermenting with a dish towel over it which is made from a porous material. Tip: think of air partying and going every which way in an aerobic fermentation.
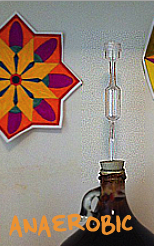
Anaerobic fermentation means gas can only leave, no new oxygen can get in, i.e you use a balloon on a narrow mouth jar with a pin prick in the end or an air valve. Or you can invest in slightly more costly apparatus like Pickl-it jars or Harsch fermenting crock pots (you could easily create something based on these designs). Tip: think of your ferment as having a modest form of anorexia in relation to gasses and only allows gas to leave.
The lactic acid that is created with a fermentation is greatest with an anaerobic fermentation. In vegetable or dairy fermentation, lacto-bacillus bacteria grows, increases vitamin content of B-12 and C tremendously and preserves the food for extended periods.
Ferments produce carbon dioxide, thus you hear stories of kombucha bottles exploding, or sauerkraut bubbling. Carbon dioxide is heavier than air and will create a natural barrier between the oxygen and the ferment—thus moving/stirring your fermentation may cause more oxygen to make contact with your goodies.
The bottom line is that you will have a probiotic fermented food if you keep it submerged in the salt water brine, using a brick, plate etc…mold where the food touches oxygen can carefully be removed without causing mold to splinter into the food.
Unless you live far away from a health food store that carries original flavored kombucha, buying a kombucha SCOBY (symbiotic culture of bacteria and yeast) is silly. It just takes a few weeks to start your own SCOBY from a bottle of kombucha.
The tastiest way to make kombucha is through a second fermentation—anaerobic style.
The Tasty second (anaerobic) fermentation kombucha recipe:
1. Brew your kombucha as you normally would (aerobically) with a dish towel/cheese cloth secured over the opening with a rubber band for two to four days.
2. Taste it, it should still be sweet. If it is vinegary then it is too fermented to make a truly schwill worthy second ferment kombucha.
3. Remove the nectar from the SCOBY and transfer the liquid into a container with a narrow mouth, add in unpasteruzied juice, dried or fresh berries, chia seeds, ginger, bitter herbs, tinctures, honey (which can’t be used in contact with the SCOBY since it is antibacterial and will kill it), sugar or sweetened herbal tea, fill as close to the top of the jar as possible.
4. Secure an airlock with a rubber stopper in the opening, air valves are reusable and really inexpensive at about $1.00 a piece, order them online or check your local brewing store for supplies.
In anaerobic conditions with increased sugars (like juice, honey etc) it will increase the alcohol content modestly. Sugar is consumed by the yeast/bacteria and alcohol and CO2 are produced…At some point all the sugar will be consumed and alcohol content will max out. You can buy a hydrometer to test it but I would expect it to hover around .05% typically.
Once all the sugar has been digested, the drink just ages and conditions. The longer the time the better. If you put an airlock on the top you can tell when most of the sugar is consumed once the airlock doesn’t pop up anymore. Let it ferment for at least five days. Taste it along the way and let the brew guide your path.
Your kombucha will be bubbly, sweet and taste more closely to the store bought stuff rather than vinegar.
Williams-Sonoma now offers home brewing kombucha kits for $60. It’s not just a kombucha brewing kit, it’s a “Brooklyn” kombucha kit and includes a rubber band! But they don’t even include instructions/ props for a 2nd anaerobic fermentation.
In the spirit of this kombucha recipe, try your hand at homemade mead making. If only I had known this when I was in high school, I could have made probiotic homebrew in my closet. Cheers!
~
Editor: Kate Bartolotta
Like elephant food on Facebook.


Read 6 comments and reply