
 Share on bsky
Making your own nut milk is rewarding and healthier than buying it at the supermarket or health food store.
And, it’s much easier than you’d expect.
For years, I bought my healthy almond milk at the health food store thinking that making my own was too complicated and time consuming. I didn’t want to spend time removing almonds’ skin or buying filters and nut milk bags.
Great news: I recently found out that I didn’t need to.
Making your own nut milk is actually super easy (way easier than I thought) and it’s absolutely awesome.
Here is a super simple, step-by-step process to making your own nut milk.
1. Get yourself ready.
First of all, make sure you have everything you need beforehand. To make and store your nut milk, this is what you’ll need:
A glass jar with a lid, or any container that your can easily close (at least 500ml)
A high-speed blender
Filtered water
1 to 2 cups of raw nuts and/or seeds
2. Soaking.
You absolutely have to soak your raw nuts and seeds before making your own milk.
Soaking will remove phytic acid. Nuts, seeds and grains all contain phytic acid, which create bloating and gas. This is why it’s important to always soak your raw nuts, seeds and grains beforehand if you don’t want to be bloated afterward.
Ideally, it’s great to soak them overnight. If you can’t, try to soak them at least 4 to 5 hours. This will make them softer and will reduce cooking and processing time.
3. Rinsing.
Once you’ve soaked your nuts and seeds in filtered water overnight, discard the soaking water and rinse them properly. Your nuts and seeds are now clean and ready to be processed into a creamy and nourishing milk.
4. Blending.
This is the most interesting part, because this is when you’ll actually transform your nuts into milk. All you’ll need to do is to put your soaked nuts and seeds in your high-speed blender with some filtered water and blend them. Always use about one measure of soaked nuts or seeds for two to three measures of filtered water.
If you want a more runny consistency, simply add more water. Or, if you’d like a thicker consistency, use less water.
The more powerful your blender is, the easier and quicker it will be to turn your nuts and seeds into a creamy milk. If your blender is not super powerful, you might have to blend for a few minutes until you get a nice milky texture.
5. Storing.
You can easily store your nut and seed milks in your fridge for several days, even weeks, without any issue. A glass jar with lid works perfectly.
6. Drinking.
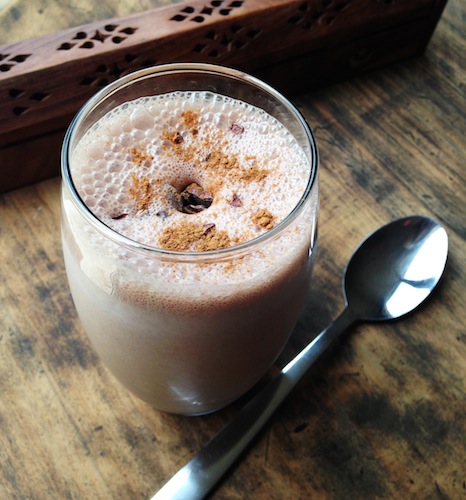
Once you’ve made your milk, you can get creative and add a pinch of sea salt, cinnamon or other spices to it.
You can also add some maca and raw cacao powder to get a delicious chocolatey milk, similar to my Maca Hot Chocolate.
You can carefully heat your nut milks if you want to use them for hot chocolates or chai lattes. But you can also have them on ice or use them in your muesli, porridges, smoothies or ice cream. Be creative.
~
Love elephant and want to go steady?
Sign up for our (curated) daily and weekly newsletters!
~
~
Author: Pauline Hanuise
Editor: Ashleigh Hitchcock


Read 1 comment and reply