
 Share on bsky
Did you know that most of the gravies, au jus, and savory-salty sauces that make meals so juicy and tasty are made with bone broth?
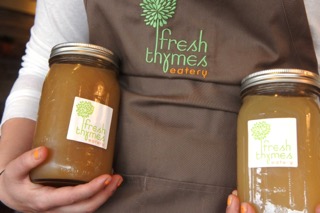
Chicken, beef, fish, pork, elk, and other bones are the base of these sauces, and extracting roasted goodness from these flavor resources is a specialty of Christine Ruch (rhymes with “book”), the chef and owner of Fresh Thymes Eatery in Boulder, Colorado.
Ruch, who grew up in Arizona, opened Fresh Thymes in 2013. She describes it as “a takeout marketplace and café specializing in ingredient-conscious food. That means no primary allergens, and all of the other ingredients are thoughtfully sourced and meant to promote health.”
Christine, who was diagnosed with celiac disease in 2006, didn’t want food allergies and sensitivities to keep her or others from enjoying a delicious restaurant experience. So she opened Fresh Thymes, a small neighborhood eatery where allergen-sensitive customers (and everyone else) can enjoy whole foods prepared with conscious attention to taste, texture, and variability. All meals are free of gluten, dairy, eggs, shellfish, and sugar. In her opinion, “You can still make all of the food that you love and excite your palate without the conventional ingredients that don’t support health.”
The Broth Bar Scoop.
Constantly innovating, Fresh Thymes opened a broth bar in early 2015. Christine explains that from its opening day, the eatery was making vegetable and chicken broth for its own recipes. Then, in late 2014, Boulder-based Locavore Delivery, a grass-finished meat-delivery business, asked Christine and her team whether they would consider using the company’s excess bones to make beef broth.
Christine and her team jumped at the opportunity. They hypothesized that their ingredient-conscious clientele would be equally enthusiastic.
They were right.
Within days of Fresh Thymes’ decision to open a broth bar, The New York Times magazine published an unrelated article about Brodo in New York City, and “bone broth” was suddenly a buzzword. As a natural and holistic chef, Christine has a deep understanding of what it takes to make great broth. This is important because there are many ways to turn bones into broth.
What is Bone Broth?
What is bone broth? It’s the flavorful liquid you get when you boil animal bones (chicken, beef, fish, pork, elk, and others) for a prolonged period of time, adding veggies and herbs to intensify the taste. You can add bone broth to your favorite recipes or pour it into a mug with some salt and start sipping. Christine cautions that you should integrate bone broth into your diet slowly, perhaps starting with chicken broth because “a lot of people find the taste of beef broth to be fairly assertive.” She also suggests that beginners use the broth for cooking—adding it to sauces and soups—rather than sipping.
Participating in the broth craze myself, I was excited to have an expert on hand to learn from.
Here are Christine’s answers to some of my burning broth questions. It’s important to note that all of her answers refer to the art of cooking broth made from beef bones.
Bone Broth FAQs
How can I find good bones?
Begin at a farmers market; connect with farmers who raise cattle and find out what their farming practices are. Christine says, “Once you start digging and getting to know the farmers and ranchers in your local community, you’ll find bones.” She also suggests asking your local grocer to stock bones from grass-finished beef; if there’s enough demand, they’ll do it.
Which bones should I use?
Grass-finished knuckle bones, rib bones, and neck bones. You want bones with a lot of cartilage.
What are the other ingredients used in broth?
After bones, you need water, apple cider vinegar, and peppercorns. Then you can get adventurous. “I think it depends on who you are, how creative you are, and what inspires you. You can add seaweed to the broth. Kombu is amazing, as are garlic, ginger, and herbs. Some people even add potatoes to boost the potassium in the broth.”
Christine uses carrots, celery, onions, and herbs in her broth, waiting until the last 12 hours of cooking to add them.
As a tip, she suggests saving the tops of your carrots and celery—the “undesirable” parts of the vegetables—from other recipes, and freezing them. Then, when it comes time to concoct a batch of broth, you can pull the veggie scraps from the freezer and just drop them into the broth. Christine never adds salt to her broth. Instead, she seasons to taste, adding salt as needed to her recipes or soup bowl.
What’s the ratio of bones to broth?
Christine has a folk approach. She says, “I am a totally non-fussy cook. I just believe that the best way to get people to engage in healthful pursuits around food, especially if they’re a novice in the kitchen, is to make it as simple and approachable as possible.” With this in mind, she suggests dumping the bones in a pot, filling it with cold water, and putting a “glug” of apple cider vinegar in the mixture. “What I generally do is fill my pot three-quarters of the way with bones. Then I fill the pot to the top with water.”
I was curious to know whether it was necessary to add more water during the cooking process. Christine answers, “If you’re on a bare simmer, you’re not going to see a ton of evaporation—maybe just an inch or two. But, if you feel like the water is going down rapidly, absolutely add more.”
How do I cook the broth?
Put the bones and water in the pot and turn the heat to high, letting the bones and water boil. Skim off the froth that rises to the top and then turn down the heat. Hold the broth at a simmer. According to Christine, “Then your job is done and you don’t have to do anything. No stirring. You want everything to just be very still.” If you stir or boil, Christine says, “You’ll end up with a cloudy broth”—and that’s not as tasty.
How long should I cook my broth?
Christine suggests three days (yes, 72 hours!). In her experience, that’s when she knows she’s extracted all the goodness from the bones. “If you remove a bone from the pot and you can see that it’s starting to get chalky, present streaks of white, or is pitted, then you know your work is done.” If you choose to stew your bones for less time and you haven’t yet seen white streaks or pitting on the bones, you can cook them for another batch. Christine prefers to cook her bone broth in a big pot on the stove, while others are more comfortable with a Crock-Pot. Your choice!
How much broth should I make at a time?
Because bone broth takes a long time to make, Christine suggests making a lot each time. You can freeze what you don’t need immediately and save the soup for later use. Broth can last in the freezer for up to six months.
Why use apple cider vinegar?
Christine responds, “Using some sort of acid is important. In a traditional culinary application, most chefs use wine—red or white, it doesn’t matter. The acidic medium pulls the minerals from the bones. It helps the leeching process, and that’s what you’re after if you’re trying to do a nutrient-dense broth.”
Concerned your broth will taste like vinegar? Christine assures us that the vinegary taste will be long gone by the time the broth is ready to eat or drink.
How can I find out more about making bone broth?
Christine suggests turning to Sally Fallon, the original broth diva, and her book Nourishing Broth.
Christine’s Roasted Chicken Stock Recipe
A golden-brown chicken stock adds a deeper flavor to dishes and a savory base to sauces. The rich stock is made by first roasting chicken bones to extract extra flavor. You can add kelp to the simmering broth for added minerals and powdered turmeric to the finished broth to boost the liquid’s anti-inflammatory power.
Yield: 2 to 3 quarts
Ingredients:
• 2 pounds chicken bones
• 1 large onion, coarsely chopped
• 1 medium carrot, coarsely chopped
• 1 large celery stalk, coarsely chopped
• 2 tablespoons apple cider vinegar
• Cold water to cover the bones
• 5 peppercorns
Instructions:
1. Preheat oven to 400° F.
2. Roast the chicken bones in a roasting pan for 30 minutes.
3. Add the vegetables and continue to roast for 15 minutes.
4. Transfer everything to a large pot. Add water to the roasting pan and scrape all the yummy browned bits off the bottom of the pan, mixing them with the water to create the base of your broth.
5. Add cold water to the pot, ensuring that you fully cover all the ingredients. Slowly bring to a boil, skimming the froth from the surface as it forms.
6. After it boils, reduce the heat and add all the remaining ingredients, except the peppercorns.
7. Simmer, uncovered, for 3 to 4 hours (the longer the better). Add water as needed to keep the ingredients fully submerged. Do not stir the broth.
8. Add peppercorns in the final 15 minutes of the simmering process.
9. Strain through a fine strainer and gently press the solids to extract all of the liquid.
10. Compost the solids and cool the liquid to room temperature.
11. Refrigerate or freeze. Stock keeps for 5 days in the refrigerator and up to 6 months in the freezer.
Enjoy!
More food goodness from Mara:
Make Kimchi at Home. {Recipe & Bonus Video}
Pickle Your Beets. {Recipe & Bonus Video}
Author: Mara Rose
Editor: Renee Picard / Assistant Editor: Ellie Cleary
Photos: Courtesy of Fresh Thymes Eatery


Read 0 comments and reply