

We learn by repeating things, and whatever we repeat the same way is what will feel “second nature” to us.
Although most of us experientially understand this, we often still approach confusing yoga poses with wishful thinking, hoping that we will be given a magical dose of understanding without having to put in the effort of hard-earned consistent repetition.
For me and most of my students, wishful thinking takes over on poses that we lack an understanding of, and for most of us, those poses are in the arm balance and inversion categories.
If this is the case for you, it’s time to go back to basics to the arm balance that started it all: chaturanga.
Here’s how you can break down yoga’s favorite push-up, chaturanga, into three distinct practice pieces, and learn to get it “right” each time you enter the pose.
How do you know if you’re getting it “right”?
Well, getting it “right” is unique from person to person.
This may be a disappointing answer, but what I mean by this is that you are the authority on your body—in fact, you are the only authority there is—and this means that you must learn to pay attention to your experience and make adjustments to your movement choices based on what feels good and what’s sustainable.
Sustainability in yoga means that we understand that what might feel “good” today might actually feel “bad” tomorrow, and to consciously direct our efforts towards movements that feel “good” today, tomorrow and always.
-
Modified Plank
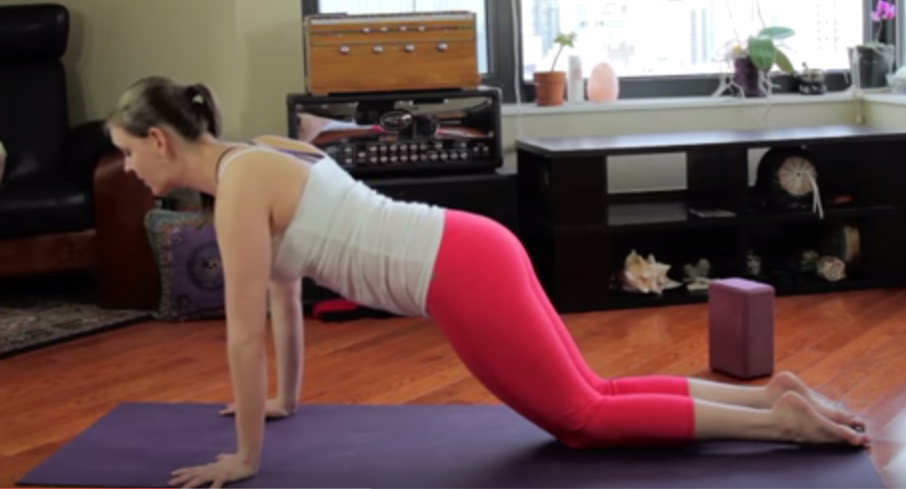
Do you doubt the power of modified plank?
Maybe you’ve tried it and felt awkward, clumsy or disengaged. Maybe you’ve been the student buckling in plank position, and while everyone else seems so comfortable, the teacher notices you buckling and throws you an aside to put your knees down. Without further demonstration or discussion, you collapse your knees to the floor, and as the rest of the room lowers themselves like cool elevator lifts to the floor, you take one big breath in before belly flopping to the mat.
I think we’ve all been there.
But modified plank position can actually be a beginning yogi’s best friend. It will help you build the strength and confidence necessary for adding in the dynamic movement of the push-up.
Here is your modified plank pose checklist. I’ve included some basic principles of energy and alignment that feel good and are sustainable for most students, but ultimately you are the authority on what is comfortable and sustainable.
Use this to develop a consistent and good-feeling modified plank, and when you have that, proceed to Step 2:
-
Two basic set-ups:
- From plank position, drop knees to floor.
- From table-top position, slide heart and pelvis forward into modified plank.
-
Arm Placement
- Layer the hands fully to the floor—all skin should touch and hands should be active (imagine you’re grabbing a stress ball, but instead of it being round, it’s the floor).
- Heart should be positioned in line with the fingernails with the weight forward in the fingers (not the wrists! if you have sore wrists in plank, chaturanga or other arm balances, this work is for you!).
- Just like handstand and other straight-arm arm balances, the arms are actually not vertical with shoulders stacking directly over wrists—the arms are diagonal, with the shoulders leaning every so slightly forward of the wrists, which allows the effort of the hands to go to the fingers.
- Hand placement is a key factor in chaturanga success, and most sloppy chaturangas have sloppy hand placement.
-
Look Forward
- Lengthen the neck and throat evenly as a cylindrical shape, then tilt the chin forward to encourage spinal elongation.
-
Repeat
- In each repetition of modified plank pose, make your attention available for adjustments, tweakings and modifications you can do to make your pose feel comfortable and sustainable.
2. Modified Chaturanga—Upper Body Basics
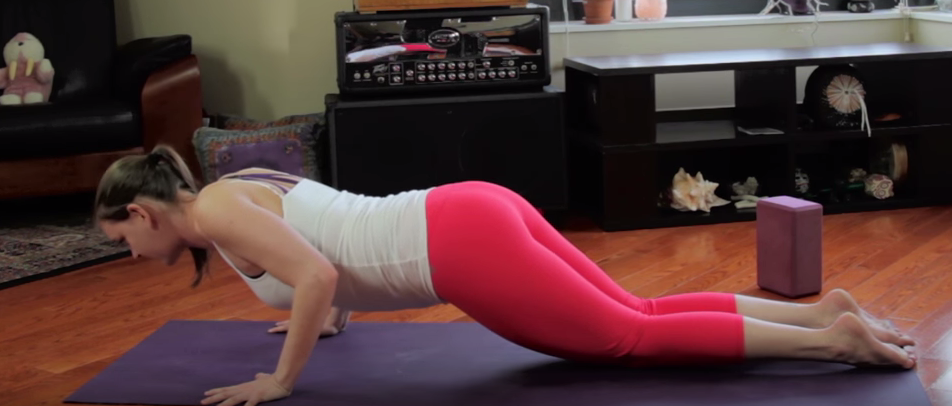
Chaturanga is a transitional posture. This means that the pose has a “start” and a “finish.” This (potentially) makes it really tricky to observe and maintain alignment from top to bottom because every moment of the pose involves dynamic movement.
And this is why modified chaturanga is the way to go.
Modified chaturanga lets you practice the pose requirements of the upper body without having to think too much or do too much with the lower body. It effectively breaks the pose in half and lets you chomp on the hardest part by itself, which accelerates your learning and creates real understanding of the most challenging aspects of the pose.
Are you ready? Here’s your checklist:
-
Start in modified plank position
-
Breathe First
- Modified chaturanga takes place during an exhale. The longer the exhale, the slower the pose; the slower the pose, the deeper your understanding; the deeper your understanding, the more comfortable and sustainable your pose becomes.
-
Arm Placement
- It might seem weird, but keep your heart in line with your fingers as you lower from top to bottom. The idea is that your upper arms are the force that lowers you and that your forearms and elbows don’t move very much. This allows you to have more control over your chest and shoulders, and ultimately helps keep the core connected.
- If your elbows are like a saw that go back and forth in chaturanga, you’re probably missing consistency in your arm movement and aren’t feeling very controlled in the pose. Try keeping your heart exactly in line with your fingernails as you begin to lower—this will demand more of your arm and chest strength, but ultimately it will feel better and more sustainable.
- The hands should “push” the floor away and “hug” towards each other during the entire transition from top to bottom.
- If this starts rounding the upper back into a turtle shell, concentrate on spreading the collar bones and exposing your arm-pit creases to the floor (by rolling your upper arm bones to the back plane of your body). This will make sure that your shoulder carriage is muscularly secure, and will eliminate your tendencies of holding strength poses with your bones.
- It might seem weird, but keep your heart in line with your fingers as you lower from top to bottom. The idea is that your upper arms are the force that lowers you and that your forearms and elbows don’t move very much. This allows you to have more control over your chest and shoulders, and ultimately helps keep the core connected.
-
Look Forward
- Lengthen the neck and throat evenly as a cylindrical shape, then tilt the chin forward to encourage spinal elongation.
-
Core
- The job of the back and belly is to mediate discussion between the shoulders and pelvis during chaturanga.
- In chaturanga, the core is activated so that the shoulders and pelvis can lower at the same height and rate to the floor.
- If your butt starts to pop up as you lower down, it could be because your stance is too short. Try backing up to modified plank position, walk your hands forward one handprint, set-up and try again.
- Modified chaturanga lets you practice the belly and back strength without the legs, which makes concentration easier and consistency more reliable.
-
Repeat
- In each repetition of modified chaturanga, make your attention available for adjustments, tweakings and modifications you can do to make your pose feel comfortable and sustainable.
3. Full Chaturanga—Full Body Integration
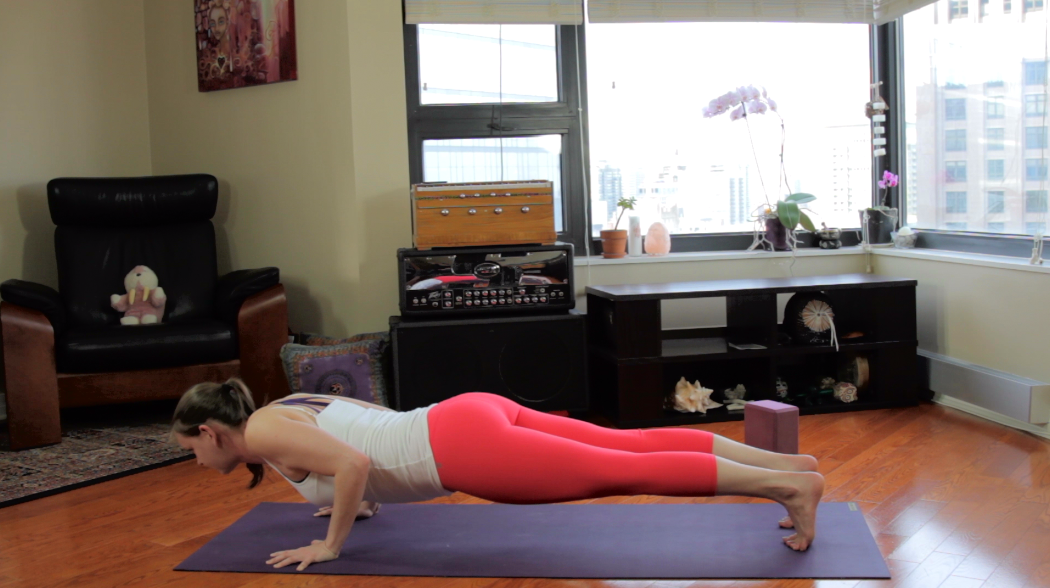
After many repetitions of modified plank and chaturanga, it’s time to move on to full chaturanga.
Are you ready? Here’s your checklist:
-
Start in Plank position
- From table-top, lift the knees and scoot your feet back until you feel mostly straight from head to toe.
- From down-dog, shift your weight forward until your heart is in line with your fingernails.
- Keep the pelvis and shoulders at the same height in space—this will let the legs charge into the pelvis and take some of the effort away from the belly and back.
-
Breathe First
- Chaturanga takes place during an exhale. The longer the exhale, the slower the pose; the slower the pose, the deeper your understanding; the deeper your understanding, the more comfortable and sustainable your pose becomes.
-
Arm Placement
- Keep your heart in line with your fingernails as you lower from top to bottom.
- Some students like to shift their weight forward onto their tippy-toes to move their heart towards their fingernails, other students like to shorten their plank stance so they can simultaneously line the heart with the nails and “push” back through their heels.
- Consistent arm placement in chaturanga is the training ground for all bent-arm arm balances (which is a lot).
- If you are someone who is excited about the prospect of balancing on your hands, stay curious and excited about chaturanga.
- Keep your heart in line with your fingernails as you lower from top to bottom.
-
Look Forward
- Lengthen the neck and throat evenly as a cylindrical shape, then tilt the chin forward to encourage spinal elongation.
-
Core
- The “core” allows the whole body to lower as one seamless unit.
- Use your arms to control your shoulders, your legs to control your pelvis, and your belly and back to unite each piece together.
- The goal is to feel the entire body working evenly. This takes repetition, observation and refinement.
-
Repeat
- In each repetition of chaturanga, make your attention available for adjustments, tweakings and modifications you can do to make your pose feel comfortable and sustainable.
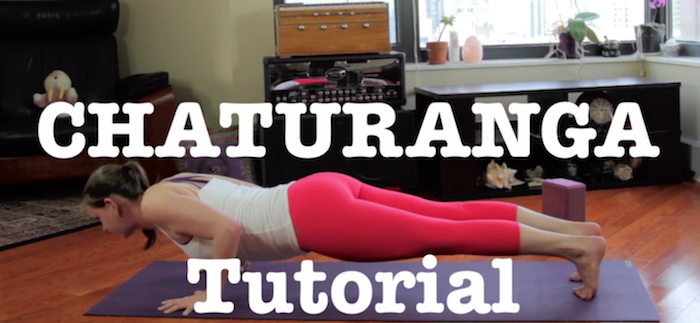
Need something visual? Jumpstart your exploration with my chaturanga tutorial video:
Relephant Read:
How I Learned 8-Angle Pose. {Video}
~
Author: Brentan Schellenbach
Editor: Travis May
Photo: Video Still


Read 1 comment and reply