
 Share on bsky
Kombucha comes with a long list of potential health benefits, but I must confess that, at first, it sounds a little scary.
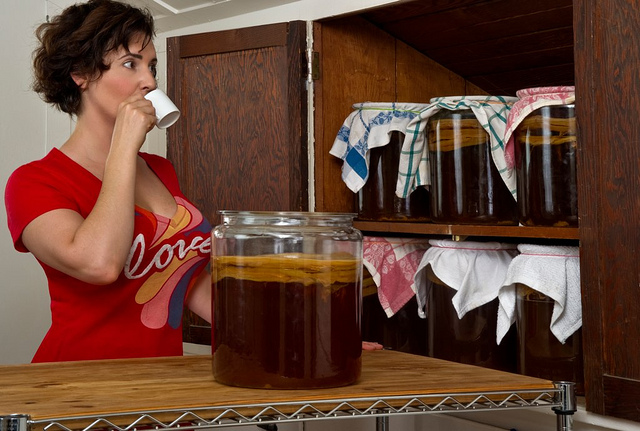
The first time I ever saw kombucha brewing was at a friend’s house. There, next to her kettle, was a large jar with what looked like alien fungi floating in dirty dishwater. When I inquired after the dubious looking jar, my friend laughed and said, ‘’It’s a kombucha plant my friend gave me. I can’t bring myself to drink it, but haven’t the heart to kill it either.”
Kombucha is made from sweetened tea fermented by a symbiotic colony of bacteria and yeast, known commonly as a “scoby,” which means: Symbiotic Culture Of Bacteria and Yeast. The scoby eats the sugar in the tea, transforming it into a refreshingly effervescent, slightly tart, fermented (but mostly non-alcoholic) beverage that is low in calories and sugar.
Before starting my kombucha journey, I read up on its health benefits and came to understand that it contains glucosamines, important compounds for maintaining joint health, as well as probiotics (good gut bacteria), which aid digestion and boost the immune system. I struggled to find scientific proof to back up these health claims, as there has been a lack of clinical studies into the curative properties of this ancient fermented tea, but the testimonials from reputable sources speak for themselves.
Harald Tietze, a clinical herbalist, wrote a book entitled Kombucha Teaology, in which he said no reputable laboratory has ever found glucuronic acid, one of the commonly quoted benefits, in kombucha. Meanwhile, researcher, Michael Roussin, who was convinced of the health-giving qualities of the beverage, hired a reputable lab to prove Tieteze wrong. Interestingly, his tests also found no glucuronic acid in kombucha. He did, however, find a different acid that is a valuable synergist. Roussin therefore concluded that kombucha, with this synergist, helps our bodies better do their jobs.
Roussin’s lab results did show the presence of the following micronutrients in kombucha : Thiamin (B1), Riboflavin (B2), Niacin & Niacinmide (B3), Pantothenic Acid (B5), Pyradoxine (B6), Biotin (B7), Folic Acid (B9), B-12, and Vitamin —and so it seems that kombucha is proven to be of some nutritional value. Another study conducted states that “four soluble vitamins have been determined: vitamin B1, B6, B12, and Vitamin C,’’ showing kombucha to indeed be a healthful drink.
I still remember ordering my first scoby: it was a time when I was feeling that a detox was in order. My first SCOBY (which I named Keith) arrived in the morning mail, sealed in a package of brown liquid. When I opened its casing and removed the rubbery, spongy culture, I began to wonder what I had gotten myself into.
I brushed aside my squeamish apprehension, and am glad I did, because from the first taste of my home-brewed kombucha I was hooked! Now I have three scoby pots happily brewing away.
Convinced? Here’s how to make homemade kombucha:
You’ll need:
>> Kombucha SCOBY
>> 2 liter glass jar
>> Tightly woven cotton cloth
>> Plastic or rubber band
>> 6 tea bags (make sure it’s plain, not flavored)
>> 200 grams granulated sugar
>> 2 tablespoons apple cider vinegar
How to grow a SCOBY:
There are companies all over the globe that sell SCOBYs to get you started. I initially ordered one online, but if you have a friend brewing kombucha too, you can start by asking them for a bottle of their unflavored product and start the scoby-growing process from scratch.
1. Pour 1 cup of kombucha into a sterilized glass canning jar. Cover tightly with a clean piece of cheesecloth or muslin and a rubber band, and place it somewhere at room temperature where it will not be disturbed.
2. Avoid areas of the house that are too hot, and also avoid areas where it would frequently be moved.
3. The kombucha will start to grow its own scoby, starting with a thin transparent film at the top of the liquid. It’s an amazing process to watch! The thin transparent film will soon thicken up into a new, thick, gelatinous SCOBY.
A quick note on cleanliness: Make sure everything is very clean when handling kombucha. It’s a living culture, a complex system of bacteria and yeasts and you don’t want contaminated. Use freshly-cleaned hands, clean, sterilized jars, and clean non-metallic tools.
How to brew kombucha:
1. Name the scoby: Giving your scoby a name helps remind you that this is a living organism and needs to be treated with respect. My first scoby is named Keith, after my tea-drinking dad (the children’s idea, not mine, I swear).
2. Brew the tea base: Boil one liter of water in a large saucepan. Put six teabags into the boiling water, add 200 grams of sugar, and stir until the sugar has dissolved. Allow it to steep until the water has cooled. This can take a few hours, do not be tempted to pop your tea in an ice bath, fridge, or freezer to speed up the cooling process as the tea should be cool but not ice-cold.
3. Add the starter tea: Once the tea is cool, remove the teabags and transfer the sweetened tea to the glass container. Stir in the starter tea. (The starter tea makes the liquid acidic, which prevents unfriendly bacteria from taking up residence during the first few days of fermentation.) For the first batch of kombucha, use two tablespoons of cider vinegar for subsequent batches; use 200 ml of kombucha from a previous batch as a starter.
4. Add the scoby: Gently slide the scoby (the lightest side upwards, if there’s a difference) into the jar with well-scrubbed, clean hands. Cover the mouth of the jar with a few layers of muslin and secure with a rubber band.
5. Find a home for the scoby: Choose a spot for your container; it should be somewhere out of direct sunlight but in a room with a relatively balanced temperature. It is important to ensure that the spot you choose will allow the jar to remain undisturbed.
6. Ferment for 7-14 days: Check the kombucha and the scoby periodically. Take a look at the darkness of the tea when you first put your kombucha culture into it, then note how the liquid changes color over the passing days. The color will change to a degree, and the liquid will become slightly cloudier. After seven days, pour a small amount into a glass and have a sip. If the brew tastes fruity and not tea-like, it’s ready. If not, leave it another day and try again. The kombucha should be a balance of sweet and tart. As you get more experienced, you will come to learn the brew duration that best suits your palette.
7. Remove the scoby: Before proceeding, prepare and cool another pot of strong tea for your next batch of kombucha. With clean hands, gently lift the scoby out of the kombucha and set it on a clean plate. As you do, check it over and remove the bottom layer if the SCOBY is getting overly thick.
8. Bottle the final brew: Pour the fermented kombucha (straining, if desired) into bottles using the small funnel, along with any juice, herbs, or fruit you want to use as flavoring. Leave about half an inch of head room in each bottle. Refrigerate. The longer you leave the bottled kombucha in the fridge, the fizzier it will get. I usually leave mine between one and three days, and it is advisable to drink it within one month.
Tips and Tricks:
>> It’s not unusual for the scoby to float at the top, bottom, or even sideways. A new cream-colored layer of scoby will start forming on the surface of the kombucha within a few days. This usually attaches to the old scoby, but it’s okay if they separate.
>> The scoby will grow more with each brew, gradually getting thicker. You can leave the scoby like this, or occasionally peel off a layer from the bottom and discard it. Or you can separate it into two pieces and pass the new scoby on to a friend or start your own kombucha farm with several batches brewing simultaneously. You may see brown stringy bits floating beneath the SCOBY, sediment collecting at the bottom, and bubbles collecting around the SCOBY; these are all normal signs of healthy fermentation.
Recipes for flavored kombucha:
Ginger Zinger:
Ingredients:
>> Freshly-brewed kombucha
>> Glass swing-top bottles
>> 1 grated teaspoon fresh ginger
Method:
>> Place the grated ginger in each bottle.
>> Pour the fermented kombucha (straining, if desired) into the bottles using a small funnel. Leave about an inch of head-room in each bottle.
>> Store the bottled kombucha at room temperature and out of direct sunlight for two days.
>> After two days, refrigerate the kombucha for at least four hours to chill it down. The kombucha will keep in the refrigerator for several weeks. If desired, strain as you serve it to catch any bits of ginger pulp.
Raspberry Fizz:
Ingredients:
>> Freshly-brewed kombucha
>> Glass swing-top bottles
>> 15 firm raspberries (frozen or fresh)
Method:
>> Place the raspberries in the bottle. If using frozen raspberries, place them in the bottle still frozen.
>> Follow the same further instructions as in the ginger recipe above.
Restorative Manhattan Cocktail:
Ingredients:
>> 1 shot tequila
>> 1 shot triple sec
>> 2 shots ginger kombucha
>> 1 tsp lime juice
Method:
>> Frost the rim of the glass with salt.
>> Shake the tequila, triple sec, and lime juice together with crushed ice.
>> Strain into the kombucha and serve immediately.
I must confess, it took a few years from that first sighting for me to really get into this form of fermentation, but now brewing kombucha has become a joy my whole family is involved in.
I hope you find as much enjoyment in your own journey, too!
~
~
~
Author: Seren Charrington-Hollins
Image: Author’s Own
Editor: Danielle Beutell


Read 0 comments and reply