

Vermicomposting Basics.
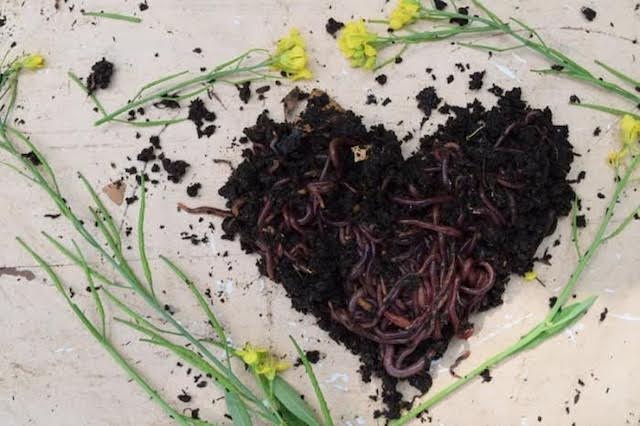
Vermiculture, or worm farming, is the use of worms to break down organic material. It is a simple way of turning table scraps, such as, the tops of vegetables, apple cores, banana peels, egg shells, coffee grounds, and even newspaper into vermicompost. The end product is a nutrient-rich natural fertilizer called worm castings. In a vermicompost bin, conditions are maintained for hosting an environment for worm reproduction.
Benefits of Backyard Vermiculture, According to Rhonda Sherman of North Carolina State University.
Vermiculture can benefit your backyard garden in the following ways:
Vermicompost is rich in nitrogen, phosphorus, and potassium and contains both macronutrients and micronutrients to benefit plant health and stimulate plant growth. It contains worm castings, partially decomposed organic materials, and organic waste with recognizable fragments of plants, food, and detritus materials.
When you apply vermicompost, rich minerals are added into the soil. Most vermicompost contains plant growth hormones, increasing plant vitality, and yields. In vermicompost, micronutrients that may ordinarily be washed away in heavy rains, such as magnesium and sulfur, are binded.
An article published in 2010 demonstrated that, “In terms of affordability, vermicomposting is superior. The great product that it yields is by far worth the small investment that it costs to get started. You can actually get started for free if you have a friend who keeps worms already. Just have your system in place first and ask them for about a dozen worms. Within a month or two, your population will start to increase.”
In the retail market, natural fertilizers can be very expensive. Finished vermicompost sells for up to $35 for a 20-pound bag. A 20-pound bag of castings can be made in your basement or backyard for pennies, once your initial costs are paid.
If you are using reclaimed materials to build an outdoor bin, you just have to buy the worms and straw bales (to be used as occasional bedding and for insulation during winter months). The costs can really be kept down, as long as you are creative with your building resources.
You could even host a vermiculturist to demonstrate building a worm bin. Any we know would be happy to present a hands-on back-yard workshop. They would probably even bring you starter worms, as long as there were at least five participants and each paid a workshop fee or gave a small donation for the presenter’s time and travel. It would help to have separate piles of reclaimed lumber or pallets, baling wire, and organic materials already prepped, as well as bedding (shredded newspaper or office paper).
Purchasing Worms.
Since there are roughly 1,000 worms per pound, they are counted by weight rather than by count. Worms can typically eat more than their weight per day. For an indoor worm bin, starting with 50 to 100 worms is fine. For an outdoor vermicompost bin, we started with 1,000 worms and they multiplied quickly. Worms can be mail-ordered.
Home Composting.
Have a composting system in place. There is an intimidating factor that comes into play with indoor home composting. Beginners often fear the dreadful smell associated with composting. If done right, there is virtually no smell. The following methods have worked best for us after years of kitchen composting:
• Use a bin with a lid. Cut holes in the lid.
• Add equal parts wet and dry material. Be sure that there is enough oxygen and moisture in the worm bin. Anaerobic composting, the result of too much moisture, gives off a very foul smell. As long as you have bedding and food scraps, as well as enough moisture, you will create the optimal composting environment.
• Keep the bin in an area that is accessible, so that it is not easily forgotten. It should be far enough away from your main living space so that the odor is not detected. We keep ours near the trash can.
• If you are really concerned about the odor and attracting fruit flies, keep the bin right outside your kitchen door or window.
Simple compost bins for kitchen scraps require the following:
• A small trash can with a pedal that lifts the lid.
• A five-gallon bucket with a lid.
• A small container with a lid (ice cream gallon bucket).
We empty ours every three days, and there is virtually no smell. If you are worried about an odor, keep a can of sawdust nearby and sprinkle on a scoop after each addition to the compost bin.
Several worm bin designs are specifically customized for indoor use. Be sure they have adequate amounts of food and bedding for the worms.
The Do’s & Don’ts of Vermicompost.
A compost bin and a vermicompost bin are different. Some items that can go into a compost bin should not go into a vermicompost bin.
Vermicompost Materials.
The following items can be composted:
• All food scraps
• Egg shells
• Coffee grounds
• Newspaper (black and white only, no color glossy)
• Cardboard, such as toilet paper and paper towel rolls
• Leaves
• Grass clippings
• Small twigs
• Plants removed from the garden after life cycle is complete. Do not add if they are infested with non-beneficial insects or are diseased.
• Weeds before they go to seed (not invasive weeds)
What Not to Compost.
It is important not to compost waste that should go to the landfill or be recycled such as plastic, Styrofoam, or any materials that won’t decompose. Do not add invasive weeds and diseased or infested plants; instead, burn them away from the garden and compost bin.
~
This was a book excerpt from Worms at Work: Harnessing the Awesome Power of Vermiculture and Vermicomposting by Crystal Stevens, New Society Publishers, 2017.
~
~
~
Author: Crystal Stevens
Image: Author’s Own
Editor: Travis May
Copy Editor: Lieselle Davidson
Social Editor: Callie Rushton


Read 0 comments and reply