

My dad is Israeli, so I was raised on hummus.
I can’t remember a time growing up when we didn’t have a bowl of it in our refrigerator and back then, hummus wasn’t as ubiquitous as it is now. They didn’t sell it ready-made in the grocery stores and most people had no idea what it was unless they had Middle Eastern relatives, like me.
I’ve always liked hummus first and foremost because it tastes good, but I love how convenient it is and what a simple, nutritious snack it makes. I was thrilled when hummus went mainstream and the prepackaged kind is great in emergencies, but it doesn’t live up to the homemade version. Grocery store hummus, in its vacuum sealed, plastic tubs, contains preservatives, namely citric acid, which affect the taste. I don’t prefer it, plus, hummus isn’t meant to sit around for three weeks before someone eats it. I don’t like the plastic packaging and buying hummus instead of making it is expensive.
Some of those little tubs cost as much as five dollars!
Making fresh hummus is much easier than you think. It tastes better than the pre-made kind, is way cheaper and healthier, and it produces no plastic waste.
When I was a teenager, my grandmother taught me how to make hummus and over the years, I’ve tweaked her recipe a bit, while still remaining true to family tradition, and now I’m passing the secret on to you.
Basic Hummus
2 cups of fresh cooked chickpeas, cooled and drained
1/3 cup of tahini (sesame) paste
1/4 cup of good quality, extra virgin olive oil (raw preferably but if you can’t find raw olive oil, use the best quality you can find).
Juice of 2 lemons
2 cloves of fresh garlic (the kind you actually have to pull off the bulb and peel yourself. Don’t cheat!)
About one to two tablespoons of finely grated white onion. (This is optional. My grandmother would tell you that it’s necessary, but I’ve started leaving it out because I don’t like onions very much and I think it’s fine.)
Dash of ground cumin
Dash of dried, ground coriander (the powder, not fresh cilantro)
Dash of hot pepper paste or sauce. In our family we use a Middle Eastern hot pepper, spice paste called Shug and it’s excellent, but you can use Harissa, Sriracha, or whatever you like, though I would avoid using anything like Tabasco because the vinegar messes up the flavor of the hummus.
Paprika and more olive oil for garnish
The most important trick to making perfect hummus is using dried chickpeas and cooking them yourself. Please listen to me when I tell you that using canned chickpeas isn’t as good. Dried chickpeas are dirt cheap and super easy to cook. Follow the directions on the bag and if you can boil water, you can cook dried chickpeas. Canned chickpeas have a metallic flavor and most likely are full of BPA, so make your own.
A bag of chickpeas will make far more than is needed for this recipe, so what I do is cook up a big batch. Then I divide the cooked chickpeas into individual two cup packages, which I freeze. They freeze very well and then whenever you want to make hummus just pull a bag out of the freezer, defrost, and you’re good to go.
Now the next step I skip, but if my grandmother were here she would tell you not to. Apparently, if you want to make perfect, velvety hummus you must skin each individual chickpea, which you do by pinching them lightly between your thumb and index finger until they pop out of their thin shell. I have terrible childhood memories of having to do this for what seemed like millions of chickpeas, so if you have kids that you want to torture or if you really want to sit and skin a couple hundred chickpeas, like my grandmother, then be my guest, but in my world? Ain’t nobody got time for that—I don’t mind some skins in my hummus.
The next part is far easier. Throw everything except the paprika into a blender, food processor, or food mill and puree it. You will get the smoothest results with a good blender. Add room temperature water a little at a time to thin it a bit and help the blending process.
Once it’s nicely pureed, taste your hummus and season accordingly. Remember, this is your hummus. You can do whatever you want to it. You want more lemon? Add some. More salt? Put it in. You like it extra-spicy? Spice it up. Some people prefer much more garlic than I do, so my garlic measurement is conservative. Feel free to add a couple more cloves.
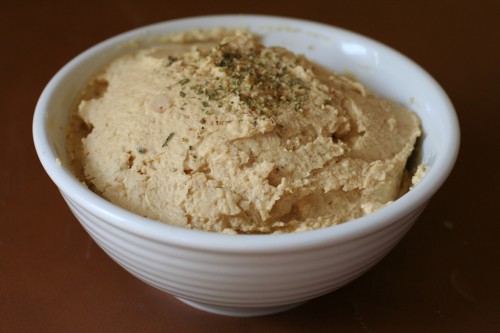
To serve: Spread the hummus on a plate, drizzle with more olive oil, and sprinkle with paprika. Serve with pita bread, rice chips, cucumbers, olives, radishes—whatever you like to dip. Also, use it as a spread on sandwiches and wraps.
Or just eat it with a spoon like pudding. That’s what I usually end up doing.
This is a very basic hummus recipe. Being a hummus traditionalist over here, I don’t like to mess with my recipe too much. However, add-ins can be delicious, so here is a list of things you can add to dress up your hummus. Be sure to add them before you puree the chickpeas.
Roasted red peppers
Artichoke hearts
Fresh cilantro
Chopped jalapeno
Pitted Kalamata olives
Sauteed spinach
Toasted pine nuts
Salsa
Baked sweet potato (Warning! My grandmother would not approve)
Lemon Zest
Roasted Garlic instead of raw
Roasted eggplant puree
Store your hummus in a glass bowl and keep it covered in the refrigerator for up to three days. If it lasts that long. Enjoy!
Relephant:
> Yoga, Culture & Hummus.
> Roasted Red Pepper Hummus & Artichokes.
> No Bean Zucchini Hummus.
Love elephant and want to go steady?
Sign up for our (curated) daily and weekly newsletters!
Editor: Bryonie Wise
Photo: elephant archives


Read 48 comments and reply